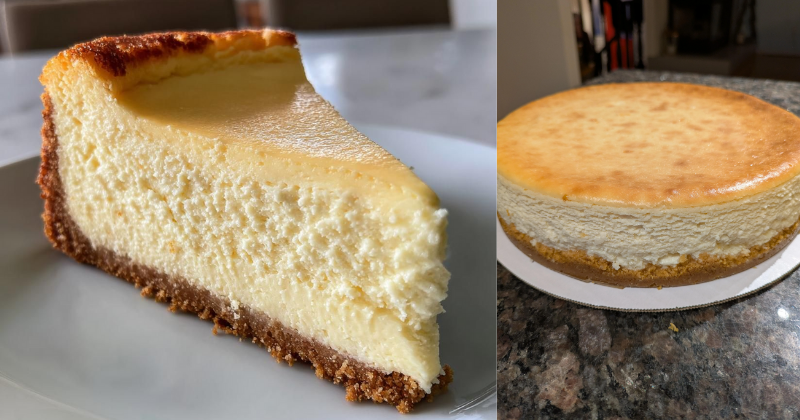
This classic New York cheesecake delivers the perfect balance of rich, creamy texture and tangy flavor that has made it America’s most beloved dessert. With its dense, velvety filling and buttery graham cracker crust, this New York cheesecake recipe creates an indulgent treat that’s surprisingly straightforward to master. While it requires some patience for proper chilling time, the hands-on preparation is manageable for home bakers of all skill levels.
Recipe Details
Prep Time: 25 mins
Cook Time: 75 mins
Total Time: 8 hours (including chilling)
Servings: 12
Difficulty: Medium
Table of Contents
Ingredients
For the Crust:
- 1½ cups graham cracker crumbs (about 12 whole crackers)
- ⅓ cup granulated sugar
- 6 tablespoons unsalted butter, melted
- Pinch of salt
For the Filling:
- 2 pounds (32 oz) full-fat cream cheese, room temperature
- 1¼ cups granulated sugar
- 4 large eggs, room temperature
- ⅓ cup sour cream
- 2 teaspoons pure vanilla extract
- ¼ teaspoon salt
- 2 tablespoons all-purpose flour
For the Water Bath:
- Aluminum foil
- Hot water as needed
Instructions
Prepare the Pan and Oven
- Preheat your oven to 325°F (163°C). Position the rack in the lower third of the oven. Wrap the bottom and sides of a 9-inch spring form pan tightly with heavy-duty aluminum foil to prevent water from seeping in during the water bath.
- Make the crust by combining graham cracker crumbs, sugar, melted butter, and salt in a medium bowl. Mix until the texture resembles wet sand and holds together when pressed.
- Press the crust mixture firmly into the bottom of the prepared spring form pan, creating an even layer. Use the bottom of a measuring cup to pack it down. Bake for 10 minutes, then remove and set aside to cool while preparing the filling.
Prepare the Filling
- Beat the cream cheese in a large mixing bowl using an electric mixer on medium speed for 2-3 minutes until completely smooth and creamy. Scrape down the sides of the bowl frequently to ensure no lumps remain.
- Add the sugar gradually while continuing to beat on medium speed for another 2 minutes until the mixture is light and fluffy. The sugar should be fully incorporated with no grittiness.
- Add eggs one at a time, beating on low speed just until each egg is incorporated before adding the next. Over mixing at this stage can incorporate too much air, leading to cracks.
- Mix in the sour cream, vanilla extract, salt, and flour on low speed until just combined. The batter should be smooth and uniform in color.
Bake the Cheesecake
- Pour the filling over the pre-baked crust, spreading it evenly with an offset spatula. Gently tap the pan on the counter 2-3 times to release any air bubbles.
- Place the wrapped spring form pan inside a large roasting pan. Carefully pour hot water into the roasting pan until it reaches halfway up the sides of the spring form pan, creating a water bath (bain-marie).
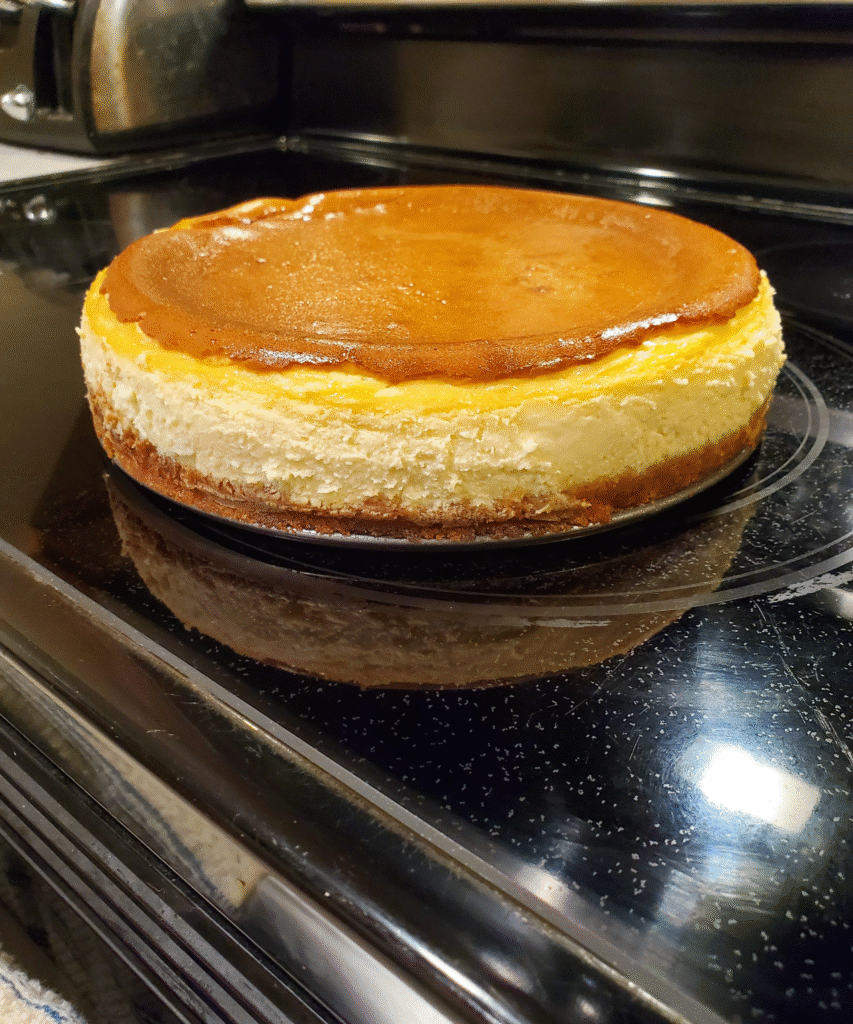
- Bake for 60-75 minutes until the center is almost set but still slightly jiggly when gently shaken. The edges should be set and lightly golden. The internal temperature should reach 150°F (66°C) when measured with an instant-read thermometer.
- Turn off the oven and crack the door open about 1 inch. Allow the cheesecake to cool in the oven for 1 hour. This gradual cooling helps prevent cracking.
Cool and Chill
- Remove the cheesecake from the water bath and carefully remove the foil. Run a thin knife around the edges to loosen the cheesecake from the pan sides, which prevents cracking as it cools further.
- Cool completely at room temperature for 2 hours, then cover tightly with plastic wrap and refrigerate for at least 4 hours or overnight. The cheesecake needs this time to fully set and develop its signature dense texture.
- Remove the spring form pan sides by running a knife around the edges once more, then carefully releasing the spring mechanism. Transfer to a serving plate using a large spatula.
Tips for Success
Room Temperature Ingredients: Ensure cream cheese and eggs are at room temperature before mixing. Cold ingredients can create lumps and an uneven texture that’s difficult to smooth out.
Avoid Over mixing: Once you add the eggs, mix on low speed and stop as soon as ingredients are combined. Over mixing incorporates air bubbles that can cause cracks during baking.
Water Bath Technique: The water bath provides gentle, even heat that prevents the edges from overcooking while the center sets properly. Make sure your foil wrap is secure to prevent leaks.
Done ness Test: The cheesecake is done when the center jiggles slightly but the edges are set. It will continue cooking from residual heat as it cools.
Recipe Variations
Chocolate New York Cheesecake: Add ¼ cup unsweetened cocoa powder to the filling and reduce flour to 1 tablespoon. Fold in 4 oz melted dark chocolate after adding the eggs.
Berry Swirl: Reserve ½ cup of plain batter. Mix remaining batter with ¼ cup berry jam or puree. Drop spoonfuls of reserved plain batter on top and swirl with a knife.
Lemon Variation: Add 2 tablespoons fresh lemon juice and 1 tablespoon lemon zest to the filling for a bright, citrusy twist.
Storage Instructions
Store covered in the refrigerator for up to 5 days. The flavor actually improves after the first day as it fully sets. For longer storage, wrap individual slices in plastic wrap and freeze for up to 2 months. Thaw overnight in the refrigerator before serving.
Serving Suggestions
Serve chilled slices with fresh berries, a drizzle of berry coulis, or a dollop of whipped cream. For special occasions, try pairing with espresso or a dessert wine. The rich, tangy flavor of New York cheesecake also pairs beautifully with tart fruit compotes or a simple dusting of powdered sugar.
This New York cheesecake recipe delivers bakery-quality results that will impress family and guests alike. The key to success lies in patience—both during the mixing process and the essential chilling time that creates that perfect, slice able texture.